
PrestaShop How-To: Edit Products on Homepage
- Border7 Studios

- Jul 13, 2016
- 2 min read
PrestaShop How-To Edit Products on Homepage
By default, PrestaShop stores come with this handy homepage feature: the ability to prominently display new products, best selling products, and products on sale. However, you may be wondering how exactly you can determine which products show up on your homepage. In this post, we are going to provide step-by-step instructions on how to edit products on the homepage of your PrestaShop store!
Part I: Changing the Popular Products
Step 1: Navigate to your store’s back office, and go to “Catalog -> Products”.

Step 2: Search for the product you want to add, and click the “Edit” button to the right of the product. Step 3: Navigate to the “Associations” tab, and in the “Associated categories” list find “Home.”
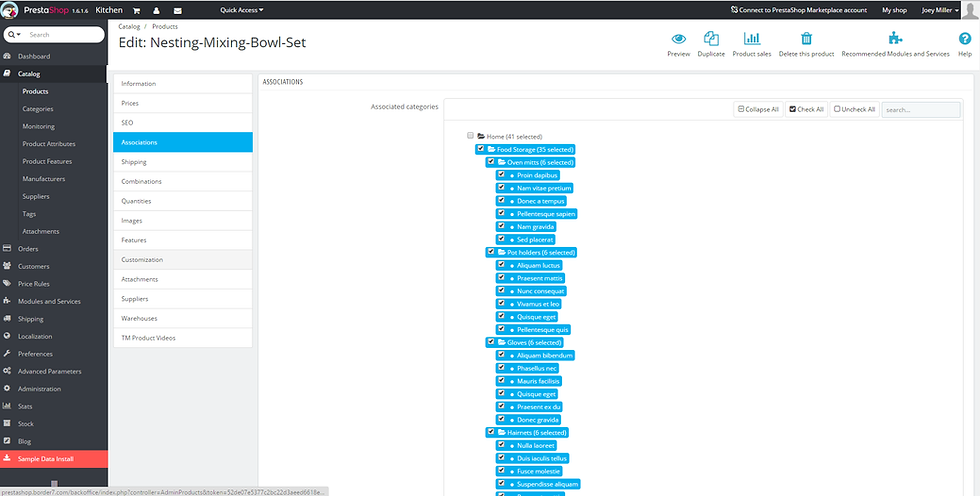

Selecting “Home” (if it’s highlighted in blue then it has been selected) means that the product will show up on the Homepage in the “Popular” section.
De-selecting “Home” (meaning that it is NOT highlighted blue, like in the picture above) means that the product will NOT show up on the homepage in the “Popular” section. (It can still show up under the “New” section).
Don’t forget to press the “Save” button in the bottom corner!
Part II: Changing the New Products
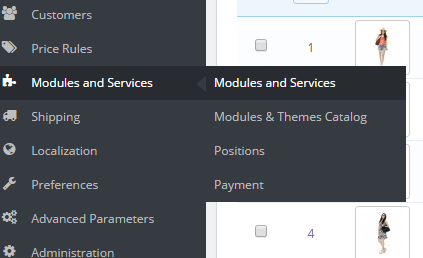
Step 4: To configure the “New Products” tab, in the left hand navigation, navigate to “Modules and Services -> Modules and Services.”
Step 5: Search for the “New products block” module and click on “Configure.”
Step 6: Change the 3 settings, and click “Save.”
Part III: Changing the Sale Products
Step 7: Make sure you have the “Specials Block” module enabled. Step 8: Navigate to “Catalog -> Products.”

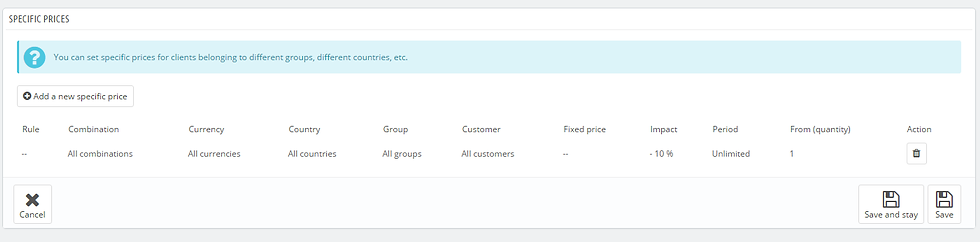
Step 9: To have a product show up in the specials module, it must be on sale. Edit a product and go to the “Prices” tab. Add special pricing to the product for it to appear in the “Specials” block. Look at the example below to see what it should look like:
Part IV: You’re finished!
Now that you’re done it’s time to celebrate! The above image shows an example of what your homepage could look like with all these modules enabled.
Need Help With Your PrestaShop Store?
If you still need some help with your PrestaShop Store, send us a message, or check out some of our other PrestaShop Tutorials. We offer several great options for maintenance if you’re looking for a one-time fix, or on-going support. We’d love to hear from you!


